Showing posts with label Snacks. Show all posts
Friday, September 14, 2012
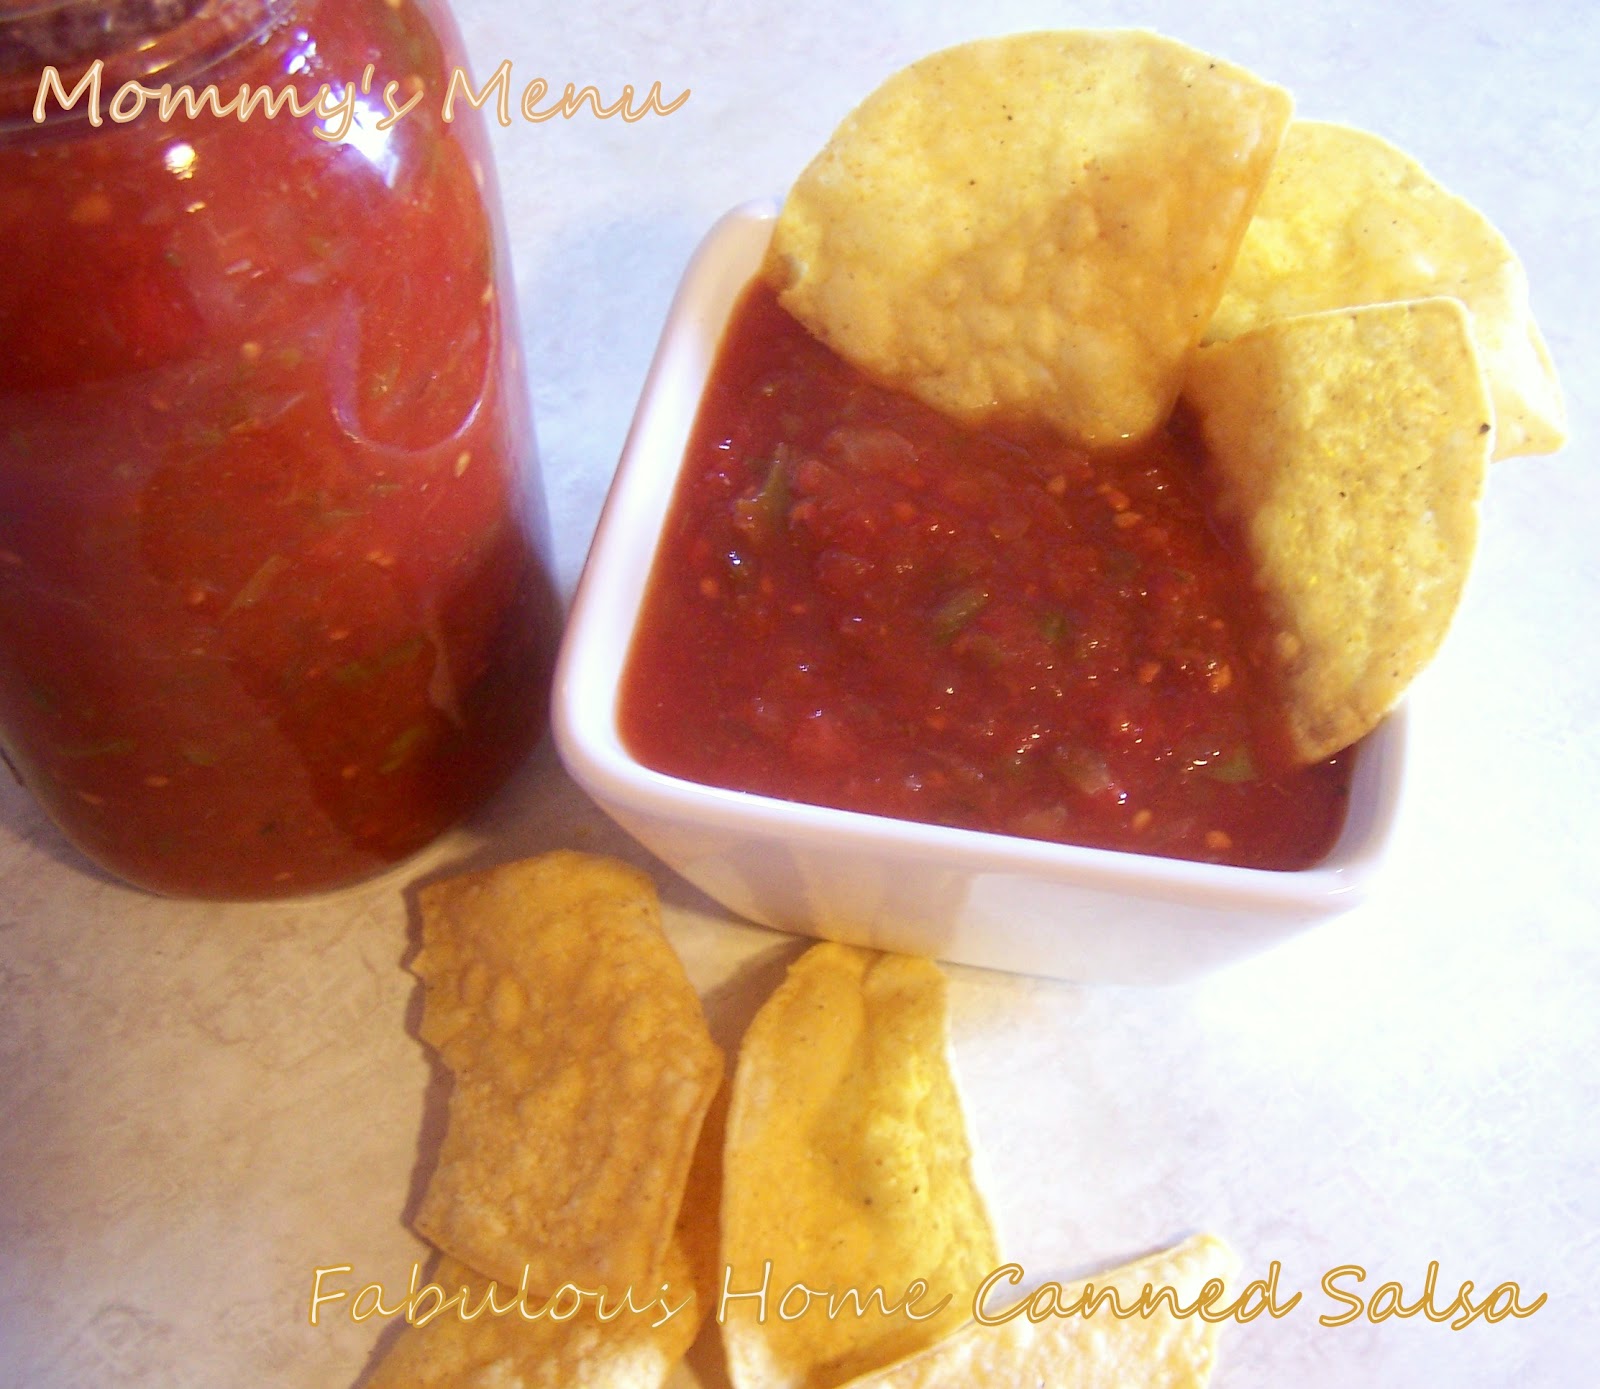
Fabulous Home Canned Salsa
It's home canning season again at my house. This time of year is one of my busiest. Between the peaches, pears, tomatoes, green beans and carrots I hardly have time to do much of anything. By the time I'm done, I'll have put up over 300 quarts. I love it! It's good news for our winter food supply!
I figured that since I was canning so much, I'd share a recipe or two. This is my Fabulous Home Canned Salsa. I've spent years looking for a great salsa recipe. Literally years! I've tried at least a dozen different recipes, but none of them have hit the spot. Some are sweet and others too vinegary. Needless to say, I was overjoyed when I tasted this salsa at one of my hubby's work parties. It's perfect. Make it as spicy as you want, or mild enough for your little one, or somewhere in the middle. Your entire family will love it!
**This recipe didn't come from an approved canning cookbook, so I called our local extension agent and verified that the recipe followed the approved home canning guidelines. The only requirements are that the amount of peppers and onions used in a canned salsa recipe not exceed the amount of tomatoes. In this recipe you shouldn't use more than 7 quarts of peppers and onions since there are 7 quarts of tomatoes. Play around with the spices all you want though, it won't hurt a thing.**
Fabulous Home Canned Salsa
Makes 9 quarts or 18 pints
7 quarts of tomatoes, peeled and diced
1/2 cup vinegar
2 cups Anaheim chili peppers, chopped
4-5 green peppers, chopped
4-7 jalapeno peppers, chopped (for mild salsa remove the seeds and membranes)
1 (7 oz.) can El Pato Hot Mexican tomato sauce (the yellow can available in the Latin section of the grocery store)
4-5 onions, chopped
1/2 cup cilantro, chopped
6 Tbs. salt
1 Tbs. garlic powder
1 Tbs. cumin
1 Tbs. oregano
2-3 (6 oz.) cans tomato paste (You won't need this if you use half paste tomatoes)
Place the prepared tomatoes into a large pot. I used a 12 quart stock pot and it barely fit. Seed the peppers/chilies, chop them up (I used my food processor and had everything chopped in less than 10 minutes) and add to the tomatoes. Add the remaining ingredients, except the tomato paste and simmer for 30 minutes. If your salsa is not as thick as you'd like, add the tomato paste until it reaches the desired consistency. Place in hot jars and adjust the lids and rings. Process in a boiling water bath for 45 minutes for quarts and 30 minutes for pints. That processing time is for an altitude of 4,000 feet. Be sure to check the proper time for your altitude.
Source: Amy L.
Saturday, September 1, 2012
Rice Krispie S'mores Bars
I'm always on the look out for new after school snacks for my kiddos. They are always starving when they get home from school, and if I don't have something ready for them they will raid the fridge and eat everything in sight. Most of the time we have bottled or fresh fruit or veggies and crackers with some kind of dip (usually ranch dip). But a couple of days a week I try to make something sweet and fun.
These were a huge hit with my kids. We love making s'mores in our back yard fire pit, but since open fires have been banned all summer thanks to the hot, dry weather, we've had to resort to indoor s'mores. These were simple to make and yummy to eat!
Rice Krispie S'mores Bars
Makes about 24 bars
7 graham crackers
2 1/2 cups mini marshmallows
1 (12 oz.) pkg. chocolate chips
2/3 cup corn syrup
3 Tbs. butter or margarine
1/2 cup peanut butter
3 cups Rice Krispie cereal
Spray a 9 x 13 baking pan with cooking spray and arrange the graham crackers in a single layer in the bottom of the pan. You may need to break the crackers to make them fit. Sprinkle the marshmallows over the crackers.
Bake at 375° for about 7 minutes or until the marshmallows are puffy. Cool completely.
In a saucepan, combine the chocolate chips, corn syrup and butter. Cook, stirring constantly until the chocolate is melted. Remove from heat and stir in the peanut butter. Then add the cereal and mix well.
Spread the chocolate mixture evenly over the marshmallows. Refrigerate for about an hour or until firm. Store in the refrigerator.
Source: Walmart Holiday Entertaining
Monday, November 7, 2011
Cake Batter Cracker Dip
I'm not sure I've mentioned this before, but I'm a cake-batter-a-holic. Seriously. I love cake batter. Its a wonder that there is ever a baked cake in my house because I eat the batter by the spoonful. Yes, I'm a little ashamed. Don't think less of me for my addiction. But the first step to overcoming it is admitting it, right? So there it is for the whole world to see.
I do have a sneaking suspicion that I'm not the only one. Cold Stone wouldn't have come up with cake batter ice cream just for me. Although if they did, it would be AWESOME! Anyway, I'm always trying to find new ways to enjoy cake batter sans the salmonella risk. (What fun is it to eat something you love if it won't love you back.) I found this idea on Pinterest--the birthplace of all great ideas and a colossal time waster (move over Facebook). The original site didn't really have a recipe, just guidelines, but really, its 3 ingredients. It can't be that hard.
Let me tell you, this dip is delish! It tastes exactly like cake batter. I love that I can tailor it to any occasion. My daughter, Brinlee, will be having a birthday party in February so I'll make this with a strawberry cake mix. You can also dip a plethora of crackers and fruit. Chocolate cake mix with strawberries. Spice cake with apple slices. Or you can go with just crackers. We used animal crackers, Nilla Wafers, and graham crackers. Whatever you do, it will be yummy!
Cake Batter Cracker Dip
Serves about 20
1 box of cake mix (any flavor)
1 1/2 cups plain or vanilla yogurt (plain yogurt will give it a tangy flavor)
2 cups cool whip
Powdered sugar to taste (I liked the tang the yogurt gave it, but mix in some powdered sugar if you like it sweeter)
Animal crackers, graham crackers, Nilla Wafers or fresh fruit
Combine all the ingredients in a bowl and mix until smooth and creamy. Refrigerate 1 hour or overnight. Serve with your favorite crackers.
**This dip actually stores really well. I made it on Saturday and here it is, Monday morning and I'm having this for breakfast while I type! YUM!**
Inspired by: Lee, Me & the Girls
Thursday, October 13, 2011
Snicker Doodle Bars
I have a confession to make. I hate baking cookies. A lot. Its just so tedious. Nine cookie sheets and 2 hours later and I'm finally finished. To labor intensive for a lazy gal like me. (Lets forget the fact that at some point I'll leave the kitchen and forget I have cookies in the oven and then serve my family charcoal briquettes.)
The solution to my laziness comes in the form of cookie bars. One pan and you're done. They are just as tasty and their individual cousins and a whole lot easier to make. Especially in the case of these Snicker Doodle Bars. No rolling into balls and rolling in sugar. These are so fast and easy its almost ridiculous!
Snicker Doodle Bars
Makes about 24 bars
2 1/3 cups flour
1 1/4 tsp. baking powder
1/2 tsp. salt
3/4 cup softened butter
1 1/4 cup sugar
1/2 cup brown sugar
3 eggs
1 tsp. vanilla
Topping:
1 Tbs. sugar
1 Tbs. cinnamon
In a mixing bowl, cream the butter and sugars. Add the eggs, one at a time, mixing well after each addition. Add the vanilla. Mix in the dry ingredients until well blended.
Spread half of the batter in a greased 9 x 13 baking pan. Mix the topping ingredients together and sprinkle over the batter.
Drop remaining batter by tablespoons full over the cinnamon sugar. Don't worry about trying to cover all the cinnamon/sugar, it will spread as it bakes.
Bake at 350° for 20-25 minutes or until a tooth pick inserted near the middle comes out clean. Cool completely and serve.
Source: My friend Kimmy
Monday, July 11, 2011
Frozen Fruit Pops
We are big fans of summertime treats at our house. The freezer is always full of Popsicles and ice cream and other junk. But interestingly enough, my kiddos prefer the healthier frozen treats. Namely, these fruit pops. And its easy to see why. They taste fresh and really cool you off on a hot day, but most important to me is that they are much more healthy than traditional frozen treats. These pops are a delicious mixture of fruits and juice. And at about 12 cents each, they won't break the bank.
Frozen Fruit Pops
Makes about 50 3 oz. pops
2 (20 oz.) cans crushed pineapple, undrained
2 (10 oz.) packages frozen sweetened strawberries, thawed and mashed
1 (20 oz.) can fruit cocktail, undrained
1 (15 oz.) can Mandarin oranges, drained
1 (12 oz.) can frozen orange juice concentrate, thawed
1 (6 oz.) can frozen lemonade concentrate, thawed
6 medium firm bananas
3 ounce plastic cups
Popsicle sticks
In a large bowl, combine all ingredients. Mix well. Spoon into cups and insert Popsicle sticks. Place on a cookie sheet and freeze until solid.
Source: A Mommy's original recipe
Wednesday, June 15, 2011
Homemade Butterfinger Bites
With all my kiddos home for the summer, I'm always looking for fun things for them to do. For them it usually involves food. I swear, they are eating me out of house and home already! I've taken to calling meal time "slopping the hogs". Not because they have bad manners (that wouldn't be tolerated), but because of the copious amounts of food they consume. Its insane. But I'll bet every mom in America is going through the same thing right now, so I'm in good company.
Anyway.... I love food projects that don't involve any baking and only dirty 1 or 2 dishes. Especially since my dishwasher seems to run non-stop lately. We all had a great time smashing peanut butter between Wheat Thins then dipping them in melted chocolate. You won't believe how good something so simple can be. And it makes a lot! We got between 50 and 60 little sandwiches. They don't go very far when you're feeding 7 hungry kids, but since they are so easy and inexpensive you can just make more! That's what we did!
Homemade Butterfinger Bites
Makes about 50-60 bites
1 (10 oz.) box original Wheat Thins crackers
1 cup creamy peanut butter
16 ounces dipping chocolate or almond bark
Sandwich about 1/2 teaspoon peanut butter between two Wheat Thins crackers; repeat until all crackers have been used. Melt chocolate in microwave at 50 percent power for one minute; stir. Return to microwave at 30 second intervals until chocolate is completely melted and smooth. Dip cracker "sandwiches" in chocolate to coat. Set on wax paper. Place in refrigerator or freezer for 10-15 minutes to set completely. Store in an airtight container.
Source: Inspired by the Blogosphere
Thursday, April 14, 2011
Easter Noodle Nests
Its spring break and all of my kiddos are home from school. Its sometimes a challenge keeping them all busy since there is such an age range between the oldest and youngest. But I know that making treats is something kids of all ages love. With Easter coming I thought it would be fun to do an Easter themed treat.
These Noodle Nests are a lot of fun! Its hands on and very sticky and gooey--everything every kid wants in a treat. We colored the marshmallows pink and filled ours with jelly beans for eggs and my 8 year old daughter set chick shaped marshmallow peeps on the nest for a mommy bird. It was a fun time.
Easter Noodle Nests
Makes 5-6 nests
4 cups chow mein noodles
3 cups marshmallows
3 Tbs. butter or margarine
jelly beans
Spray a cookie sheet with non-stick cooking spray and set aside. Pour the chow mein noodles in a bowl and set aside. Melt the butter in in saucepan over medium heat, stirring constantly until smooth. Pour the marshmallow mixture over the noodles and stir until well coated.
With buttered hands, divide mixture into 5 balls. Make an indentation in each ball with the back of a buttered spoon. Allow to cool, fill with jelly beans and eat!
Source: A Mommy's original recipe
Monday, April 4, 2011
Crunchy Chicken Nachos
There are just some days when you don't have time to cook. Those seem to be happening more and more around my house. With 3 busy teenagers and 4 smaller children, I seem to be burning the candle at both ends and spreading myself way to thin. So to simplify meal times, I've been collecting and trying some quick and easy recipes. The kinds of meals that I always have the ingredients to make and can be put together in just a few minutes. The only catch is that I don't want to sacrifice taste for ease and convenience.
I ran across these nachos at allrecipes.com, and they are just the kind of quick meal I've been looking for. It is cheesy and crunchy and perfectly flavored. I love these because they make a great quick dinner or a late- night-we're-watching-a-movie snack. It can also be tailored to your tastes. Add olives, some sliced jalapenos, black beans or fresh tomatoes. The sky's the limit, so make it your own.
Crunchy Chicken Nachos
Serves 8
2 cloves garlic, crushed
1 small yellow onion, diced
3 tablespoons vegetable oil
1 shredded, cooked, whole chicken breast
salt and pepper to taste
1 cup pico de gallo salsa (I used my favorite brand of jarred salsa)
1/2 (12 ounce) package tortilla chips
1 (8 ounce) package shredded Cheddar/Monterrey Jack cheese blend
6 green onions, sliced, green parts only
sour cream for serving (if desired)
guacamole for serving (if desired)
6 green onions, sliced, green parts only
sour cream for serving (if desired)
guacamole for serving (if desired)
Preheat oven to 350 degrees F (175 degrees C).
In a 12 inch skillet over medium heat, cook and stir the garlic and yellow onion in canola oil until tender. Mix in shredded chicken, salt and pepper. Toss until well coated with oil. Stir in the salsa.
Arrange tortilla chips on a large baking sheet. Spoon the chicken mixture over tortilla chips. Top with Cheddar/Monterrey Jack cheese blend.
Bake in the preheated oven 10 minutes, or until cheese has melted. Remove from heat and sprinkle with green onion tops before serving. Serve with sour cream and guacamole if desired.
Sunday, December 5, 2010
Piggys in a Blanket
These little beauties are better than your average pigs. Most of the time these are made with crescent roll dough and hot dogs. I love that this version is made with breadstick dough and lil' smokies. The flavor of the smoked sausages just cant be beat. My kids love making these, and we all love eating them. Try using the cheddar cheese flavored lil' smokies for a new twist. We love these dipped in BBQ sauce or honey mustard.
Piggys in a Blanket
Makes 36 appetizers
1 pkg. lil' smokies smoked sausages
1 pkg. Pillsbury bread stick dough
1 egg white
1 Tbs. water
Poppy seeds (optional)
Unroll the bread stick dough and cut into thirds. Roll each sausage in a piece of dough. Place on a greased baking sheet. Mix together the egg white and water and gently brush over the top of the bread dough. Sprinkle with poppy seeds. Bake at 350° for 18-20 minutes or until golden brown.
Source: My friend Carrie S.
Thursday, September 23, 2010
Baked Cinnamon Chips
My friend asked me why in the world I'd start another food blog when I already have one that I post on everyday. There are 2 answers to that question. First, in January I'll only be posting on my dutch oven blog once or twice a week. The second answer requires a picture.
This is the contents of what I call my recipe drawer. It is a 6" high, colossal, unorganized mess! As I sit here thinking, I have another stack in one of my kitchen cupboards that is almost as big. And that doesn't include the 100+ pages of recipes I have on CD or the dozens of files I have saved on my computer. I've never even tried most of these recipes! See why I need another food blog. I really need a way to organize all of this. Whew! That's going to be a big job.
But for today, I'll share one of my kids favorite treats. I've been making these forever and my kids love them. They make great after school snacks and are yummy additions to school lunches. During the summer I make a fruit salsa to dip them in or a Strawberry Marshmallow Fluff dip. This is also a great way to get your kids involved in the kitchen. My 5 year old daughter, Brylie, helped make these. She doesn't normally have a beard, but it happened to be Pirate Day in kindergarten and she didn't want to wash it off. She is so funny!
This is the contents of what I call my recipe drawer. It is a 6" high, colossal, unorganized mess! As I sit here thinking, I have another stack in one of my kitchen cupboards that is almost as big. And that doesn't include the 100+ pages of recipes I have on CD or the dozens of files I have saved on my computer. I've never even tried most of these recipes! See why I need another food blog. I really need a way to organize all of this. Whew! That's going to be a big job.
But for today, I'll share one of my kids favorite treats. I've been making these forever and my kids love them. They make great after school snacks and are yummy additions to school lunches. During the summer I make a fruit salsa to dip them in or a Strawberry Marshmallow Fluff dip. This is also a great way to get your kids involved in the kitchen. My 5 year old daughter, Brylie, helped make these. She doesn't normally have a beard, but it happened to be Pirate Day in kindergarten and she didn't want to wash it off. She is so funny!
Baked Cinnamon Chips
Flour tortillas (I like the 6" tortillas, but any size will work)
Melted butter
Cinnamon sugar mix
With a pastry brush, spread melted butter on one side of each tortilla. Sprinkle with cinnamon sugar mixture. Be generous with both the butter and the cinnamon, this is one case where more is better! Cut into wedges or strips and transfer to a baking sheet. Bake at 350° for 10-12 minutes. The tortillas should be crispy and curl on the edges, but not browned. Cool on a wire rack.
Marshmallow Fluff Dip
Strawberry flavored cream cheese
Marshmallow cream
Mix until it is uniform in texture and color and serve with these chips or fresh fruit.
Source: A recipe I've been making my kids for 15 years.
Subscribe to:
Posts (Atom)