Showing posts with label Vegetables. Show all posts
Monday, September 16, 2013
Garlic Bread Tomatoes
Well hello everyone! I've been on hiatus lately, which is code for I've been really busy and haven't managed my time well enough to get everything done. No, actually, I've been enjoying the summer with my 7 fantastic children. They are growing up so fast, and I didn't want to miss the last summer we would ever all be home. You see, my oldest son, Colton is spending the next 2 years as a missionary for the Church of Jesus Christ of Latter-day Saints in the great state of Montana. So far, he has thoroughly enjoyed his time there and has met so many wonderful people! Amazing, down to earth, good people. I'll tell you more about that later, but right now, these lovely tomatoes are the order of the day.
In my area, the tomato plants are just loaded with what is, without a doubt, the main reason we have summer. The only reason to endure the 105° temperatures is to go to the water park and eat tomatoes. I have so many tomatoes I've been searching for new ways to use them. I've already made several batches of my favorite home canned salsa, eaten more tomatoes and cottage cheese than should be allowed by law and shared them with everyone I know and I still have them coming out my ears! I've tried to incorporate them into every dish I make. Then I found these.
Let me tell you about this dish. It is so delicious and wonderful and different that it will knock your proverbial socks off. It really is a great side dish. Just a touch of garlic and a hint of fresh basil topped with a crispy crumb coating. It's a party in your mouth. It is also low fat and really quite healthy. And as I sit here writing this I'm contemplating how I could make these on the grill to add a smokey outdoor flavor to them. Hmmmm.... I think I know what I'm trying for lunch today.
So grab a tomato out of the overflowing bowl you have sitting on your counter (come on, you know you have one of those this time of year too) and give these a try, you'll love them.
Garlic Bread Tomatoes
Serves about 4
1 large tomato, cut into fourths horizontally (Be sure to use a nice meaty tomato, or you could end up with a watery side dish)
1/3 cup freshly grated Parmesan cheese
1/4 cup Panko bread crumbs
2 cloves of garlic, minced
Chopped basil leaves (fresh is best, but dried will do in a pinch)
pinch or two of coarse salt
pinch of freshly ground pepper
1-2 teaspoons extra-virgin olive oil
Preheat oven to 425° F. Mix the bread crumbs, Parmesan and chopped basil leaves together.
Place the tomatoes on a baking sheet lined with parchment paper. Top with garlic and sprinkle lightly with salt and pepper. Don't over do it on the garlic. A little goes a long way in this dish. We are going for light garlic flavor, not vampire repellent.
Then carefully add spoonfuls of the Parmesan/bread crumbs mixture to the top of each tomato slice. Drizzle with oil and bake until the tomatoes are tender, about 10 minutes. Serve immediately.
Adapted from: Savoring the Thyme
Monday, June 10, 2013
Smokey Grilled Corn
Grilling season is in full swing, as are the warm temperatures. It was 93° here today. Way to hot for this early in June, and way to hot to be cooking indoors. The air conditioning is barely adequate in our 100 year old house, so we try to keep things cool at all costs. Once the house heats up it takes hours to cool down. Whoever said old homes were "charming" never lived in one. No really, I love my old house, even with all the challenges it has presented in the last 20 years.
I'm getting just a little off subject here. Where was I? Oh yes, grilling. I've really gotten into finding unique recipes to try on the grill. We normally just cook the old stand bys like everyone else, burgers, steak, hot dogs and chicken, but lately I"ve been experimenting with veggies and mushrooms. Its been a lot of fun!
The idea for this recipe came from the caterers at one of my hubby's work parties. They served this great grilled corn that was seasoned with paprika and parsley. It was great but we all thought it was missing something so I took the idea and ran with it. Over the course of last summer I messed around with the recipe and I've come up with something I think is a real winner.
One of the best things about it is that it cooks on the grill right along with the meat. In fact the smokiness of the grill is what makes this corn taste so good. This would be a great side at your Father's Day BBQ this weekend.
Smokey
Grilled Corn
Serves
6-8
4Tbs.
Butter
½
tsp. Smoked Paprika
½
tsp. Salt
1/8
tsp. Pepper
½
tsp. Chili powder
3 tsp. Parsley
Juice
of ½ a lime
1
clove minced garlic
1 16
oz. Bag frozen corn (you can also use 2 ½ cups of fresh corn cut off
the cob)
Tear
off 2 large sheets of heavy duty aluminum foil and place one on top
of the other. Fold up the edges to form a foil pan about 8-10 inches
across. You could also use a small disposable foil pan for this.
Next
to your steaks or burgers, place the foil pan on the grill over
medium high heat. Add the butter and allow to melt and get nice and
bubbly. Add the corn and the remaining ingredients to the foil pan.
Stir to coat the corn with the spices.
Close
the lid on the grill and allow the corn to cook right along with your
meat. It will soak up the smokey flavor of the grill and be
fantastic! Stir it occasionally so it heats evenly and the spices
are distributed nicely. Once the corn is heated through, remove from
the grill and enjoy!!
**You
can also make this on your stove top in a frying pan.**
Source: A Mommy's Original Recipe
Monday, January 21, 2013
SRC: Broccoli, Bacon Cheddar Mashed Potato Bites
It's time for another installment of the Secret Recipe Club! We all took the month off in December for the holidays, but now I'm ready to be back in full swing. This month I got to poke around Making Memories With Your Kids. Erin's site is amazing. It has been a great resource for me when I need a kid friendly recipe or a fun activity for my kiddos on a snowy day. I'm not really the "fun mom" who always has fun things for the kiddos to do and plays games and such. I really have to work at it for some reason. But it's nice to have a ton of ideas at my fingertips. I made several of Erin's recipes, and it was really hard to decide what to actually post. Between the Two Tone Cheesecake Bars and the Cream Puffs it was a delicious month at our house.
So on the recipe! This month I chose Bacon, Broccoli, Cheddar Mashed Potato Bites. It's so funny that I found these because I've been looking at mashed potato bites recipes for a couple of months and wondered if they were worth trying or not. Most of what I found were pretty plain Jane type recipes. But when I saw these chuck full of broccoli, cheese and BACON (sigh, heaven!) I knew what I needed to do. And let me tell you, these are sooooo good! Cheesy, bacony goodness in every bite! They are nice and crispy on the outside and creamy on the inside. My kiddos were going nuts over them. It's a wonder that any of them made it to the dinner table. Every time someone walked by they'd steal one. Little stinkers! :)
Now Erin makes hers out of something called "leftover Loaded Mashed Potatoes". I've never seen this mythical thing myself. I've never even imagined something so wonderful as that. At my house, potatoes don't stand a chance. If I made 50 pounds of mashed potatoes we still wouldn't have any left over. So feel free to use your leftovers, they make these so simple, or you could make them from scratch.
Broccoli, Bacon Cheddar Mashed Potatoes
Serves about 10
3 pounds potatoes, peeled and cubed
1 1/2 cups shredded cheddar cheese, divided
2 cups cooked and chopped broccoli
1 cup sour cream
1 cup mayonnaise or Ranch Dressing
3 green onions, finely chopped
8 slices bacon, cooked crispy and chopped
3 eggs
1 cup plain breadcrumbs
1 cup panko bread crumbs
Cover potatoes in water in a large pan
and bring to a boil. Reduce heat to low and cook 10 minutes or until
potatoes are tender. Drain and mash.
Stir in the cheddar cheese,
mayonnaise or ranch dressing, sour cream, broccoli, green onions and 8 slices of bacon
(crumbled.)
Refrigerate for 2 hours or overnight.
Remove them from the refrigerator and form them into balls about the size of a golf ball.
In one bowl beat 3 eggs. In another bowl add 1 cup bread crumbs and 1 cup Panko crumbs. Dip each ball into the egg and then the bread crumbs.
Fry in hot oil for about 3 - 4 minutes. Using a slotted spoon, remove and place on a paper towel. Serve immediately.
Thursday, August 2, 2012
Zucchini Gratin
If you have an over abundance of zucchini, raise your hand! I love zucchini so I can never have to much. In my area the joke is that if you leave your windows rolled down or your car doors unlocked during church you'll find your car filled with zucchini. I personally don't see a problem with that. There are so many ways to cook it that we never seem to get bored with it.
Lately, I've been trying some different recipes that I probably wouldn't have tried in the past. I haven't worried about whether my kiddos would like them, I'm just trying to expand their palates a little bit by trying familiar foods in a different way. Is it working, you ask? The jury is still out, but trying new dishes is (almost) never a bad thing. Sometimes you find something unexpected that you really love!
Take this Zucchini Gratin for example. I was questioning my judgement a little as I was pouring the eggs over the zucchini. I certainly didn't expect to love this stuff! But love it I did. It is really different and could probably be served for brunch as well as at dinner.
Zucchini Gratin
Serves about 8
1 Tablespoon Olive Oil
3 cloves Garlic, Minced
1 whole Medium Onion, Chopped
2 whole Roma Tomatoes, Chopped
3 whole Medium Zucchini, Sliced And Halved
1 teaspoon Ground Thyme
1 teaspoon Salt
2 Tablespoons Flour
2 whole Eggs
1/2 cups Half-and-half
1/2 tsp. sriracha hot sauce or Tabasco (Add more if you like some heat with your eggs.)
1/4 cups Shredded Cheddar
1/4 cups Grated Parmesan
Preheat oven to 350 degrees F. Coat a 2 quart casserole or glass baking dish with cooking spray.
Over medium heat, saute garlic in just enough olive oil to coat your skillet. Add onion and chopped tomatoes; stir and cook until onion is tender.
Add zucchini, thyme, salt and flour. Stir and cook for a few more minutes until zucchini is tender. Spread veggies in prepared pan.
Whisk together eggs and sriracha with half and half. Stir in cheddar cheese. Pour this egg mixture over veggies. Sprinkle on grated Parmesan. Bake in 350 degree oven for 30-35 minutes, or until lightly puffed up and a bit golden on top.
Source: Tasty Kitchen
Thursday, June 21, 2012
Broccoli, Grape and Pasta Salad
Have you ever found a recipe you love so much that you make it over and over and over? Well this is that kind of recipe for me. I've made it no less than 6 times in the last month. And I doubled it every time. I've eaten pounds and pounds of the stuff and I still love it. When I make it my kiddos beg for it. How many kids beg for broccoli? It is that good!
I've taken this to a half a dozen potluck over the last couple of months and every time I come home with an empty bowl and multiple recipe requests. I've even started taking copies of the recipe to hand out. So remember this for your Fourth of July bbq or your next backyard weenie roast. You won't be disappointed!
Broccoli, Grape and Pasta Salad
Serves 6-8
1 cup slivered almonds
1/3-1/2 cup sugar
1
(16-oz.) package bow-tie pasta
1 pound
fresh broccoli
1 cup
mayonnaise
1/3 cup
sugar
1/3 cup
diced red onion
1/3 cup
red wine vinegar
1 teaspoon
salt
2 cups
seedless red grapes, halved
8
cooked bacon slices, crumbled
Stir together the almonds and sugar in a skillet over medium heat. Stir often until the sugar begins to melt, then stir constantly until the almonds are coated and the sugar is completely dissolved. Spread on a piece of foil that has been coated with cooking spray and allow to cool.
Prepare the pasta according to the package directions.
Meanwhile, cut the broccoli into florets.
Whisk together the mayonnaise and the next 4 ingredients in a bowl. Combine the broccoli, hot cooked pasta and grapes. Stir in the mayonnaise mixture and stir to coat. Cover and chill for 3 hours. Stir in bacon and candied almonds just before serving.
Source: Adapted from Southern Living September 2011
Labels:
Bacon,
Fruit,
Pasta,
Potluck,
Salads,
Side Dishes,
Vegetables
Monday, June 18, 2012
Secret Recipe Club: Baked Bananas and Chocolate
I have to admit, I was a little intimidated by Brittney and Julie's blog. Being the exact opposite of vegan (I'm as carnivorous as a T-rex) I wasn't sure what to expect. But I was pleasantly surprised! I'd always wondered what kinds of foods vegans ate and if they could even eat anything "normal". I was completely blown away at the variety of recipes on the blog. Who knew you could make that many dishes without using any animal products.
I do have to say one thing about this blog. These girls are dedicated. I've never even considered how difficult living a vegan lifestyle can be. But after reading this blog, I have new found respect for the time, research and dedication it takes. We aren't just talking about cutting out meat. That would be relatively easy, but animal products are in everything. It takes a lot of work to learn to live and cook without them.
I chose to share two recipes. The Baked Bananas with Chocolate I made because I've been on a bit of a banana kick lately. I must be low on potassium or it could be that this recipe pared bananas with melted chocolate and chopped nuts. I also added some strawberries in for good measure. It was fabulous!
The second recipe I made was a Pita stuffed with summer veggies, quinoa and guacamole. My hubby has diverticulitis thanks to the intestinal problems he brought home after two years in the Philippines so we always eat a high fiber diet. He had a flare up and we spent a night in the ER last week, so we are taking the high fiber diet very seriously right now. Not only did this fit that bill, but it tasted great! It was so good that I made a second batch to save for lunch the next day.
**I did substitute what I had available for the vegan items. For the original recipes click on the links above.**
Baked Bananas and Chocolate
Serves 4
3 bananas
1-2 Tbsp. flour
3 Tbsp. chocolate chips
2 Tbsp. milk
1/2 tsp. vanilla
2 Tbsp. peanuts, processed in the food processor briefly, or chopped finely
1 Tbsp. shredded, unsweetened coconut, for garnish
1/4 cup chopped fresh strawberries
Preheat the oven to 350 F. Peel the bananas and slice off the tips; cut in half the long way, then slice each half in half to make 4 long slices.
Pour the flour onto a plate and dredge the banana pieces in it. Line a baking sheet with parchment and place the dredged banana on. Bake in the oven for 8 minutes, flip, then bake another 6 minutes.
Meanwhile, prepare the chocolate sauce. In a double boiler or in the microwave, combine the chocolate, vanilla, milk, and peanut pieces. Stir to combine.
When the bananas are done, carefully move them to a serving plate then drizzle with the chocolate sauce, garnish with the coconut flakes and strawberries and serve.
Summer Vegetable Saute
Serves about 4
2 medium zucchini, diced
2 tsp kosher salt
1 Tbsp olive oil
1 red or yellow onion, chopped
2 cloves garlic, minced
4 ears corn, kernels sliced off (I used frozen corn)
1 large tomato
1 Tbsp fresh basil, minced
1⁄2 to 1 cup drained and rinsed black beans, depending on how much you want.
1/4 to 1/2 cup cooked quinoa (depending on how much you want)
1 avocado, diced
To help drain the water from the zucchini, place in a colander and set over a bowl. Sprinkle with salt; toss and let stand 20 minutes.
Transfer zucchini to a kitchen towel and pat dry before cooking.
In a large skillet, heat oil over medium-high heat. Add onion and garlic and sauté 3 to 5 minutes until soft.
Add zucchini and corn. Saute 6 to 7 minutes until vegetables are almost tender.
Add diced tomato; sauté 2 to 3 minutes until softened and zucchini is tender.
Add basil and saute for 1 minute.
Add black beans and quinoa and allow everything to get heated.
Remove from heat, add the avocado and stuff inside a pita or roll up in a whole wheat tortilla. This can be enjoyed hot, or put in the fridge and enjoyed cold later.
Wednesday, June 13, 2012
Marinated Cucumbers
Have you ever had one of those times in life where your family lives off frozen pizza and grilled cheese sandwiches for weeks at a time? I know I can't be the only one. I'm just grateful that frozen burritos never killed anyone, at least in the long run.
You see, my mother in law finally bought a house, so we've been helping her move. There's something I never want to do. Moving is such a nightmare. Thank goodness the worst is over and we've been able to get back to a partly normal life. We also made it through with no hernias, which is nothing short of a miracle considering how much her furniture weighs.
With summer finally making an appearance, we've really been craving fresh food. It's to early to have produce from my garden (which I've managed to put in the past few weeks) so thank goodness for the produce section at the grocery store. We can eat fresh year round.
These delicious little marinated cukes make a great side dish or a refreshing snack. I love them so much I've started keeping them in a container in the fridge. Even my kiddos have been snacking on them. They are tangy and sweet at the same time and the dill adds just a hint of pickle flavor. They are delish!
Marinated Cucumbers
Serves about 6
4 medium cucumbers
1/3 cup sugar
1/2 cup apple cider vinegar
1 tsp. salt
dash of pepper
1 tsp. dill weed
Mix everything except the cucumbers in a gallon size zip top bag. Add the cukes and marinate in the refrigerator for at least 1 hour. Remove from the bag with a slotted spoon and serve.
Monday, May 7, 2012
Strawberry Spinach Salad
Have I mentioned that I love strawberries? Have I mentioned that I jammed, froze, buttered and ate 96 pounds of strawberries this week? 96 pounds. That's more than my 12 year old daughter weighs. It's a little mind boggling if I think of it that way. But when you find such a great deal on berries, what else can you do? And as tender as these little beauties are, they can't sit around in the fridge very long. (As if I had fridge space for that many berries!)
I really had to get creative about using them. I did make 40 pints of the obligatory strawberry jam and froze 6 gallon bags of berries, but that still left me with more berries than I knew what to do with. It also left me with a fun challenge. Finding new and delicious ways to use them. I thought I'd start out Strawberry Palooza with a tried and true recipe that has been a favorite around my house for years.
This happens to be one of my all time favorite spring salads. It is so bright and vibrant and has really great flavors and textures. Everyone down to my 7 year old loves this one. My favorite part is the candied almonds. I think they make this salad! I hope you enjoy it as much as we do.
**This salad does not store well. Assemble it right before serving.**
Strawberry Spinach Salad
Serves 10
1/4 cup slivered almonds
2 tablespoons sugar
1 package (10 ounces) fresh spinach, torn
1 cup fresh strawberries, sliced
DRESSING:
2 tablespoons canola oil
1 tablespoon cider vinegar
1 green onion, finely chopped
1-1/2 teaspoons sugar
1-1/2 teaspoons Worcestershire sauce
1 teaspoon poppy seeds
1/4 teaspoon salt
Dash paprika
In a large skillet, cook and stir almonds and sugar
over medium low heat until sugar is dissolved and almonds are coated. Spread on
foil to cool; break apart.
In a large salad bowl, combine the spinach,
strawberries and almonds. In a jar with a tight-fitting lid, combine the
dressing ingredients; shake well. Drizzle over salad; toss gently to
coat. Serve immediately.
Source: Taste of Home
Labels:
Fruit,
Potluck,
Salads,
Side Dishes,
Strawberries,
Vegetables
Saturday, February 11, 2012
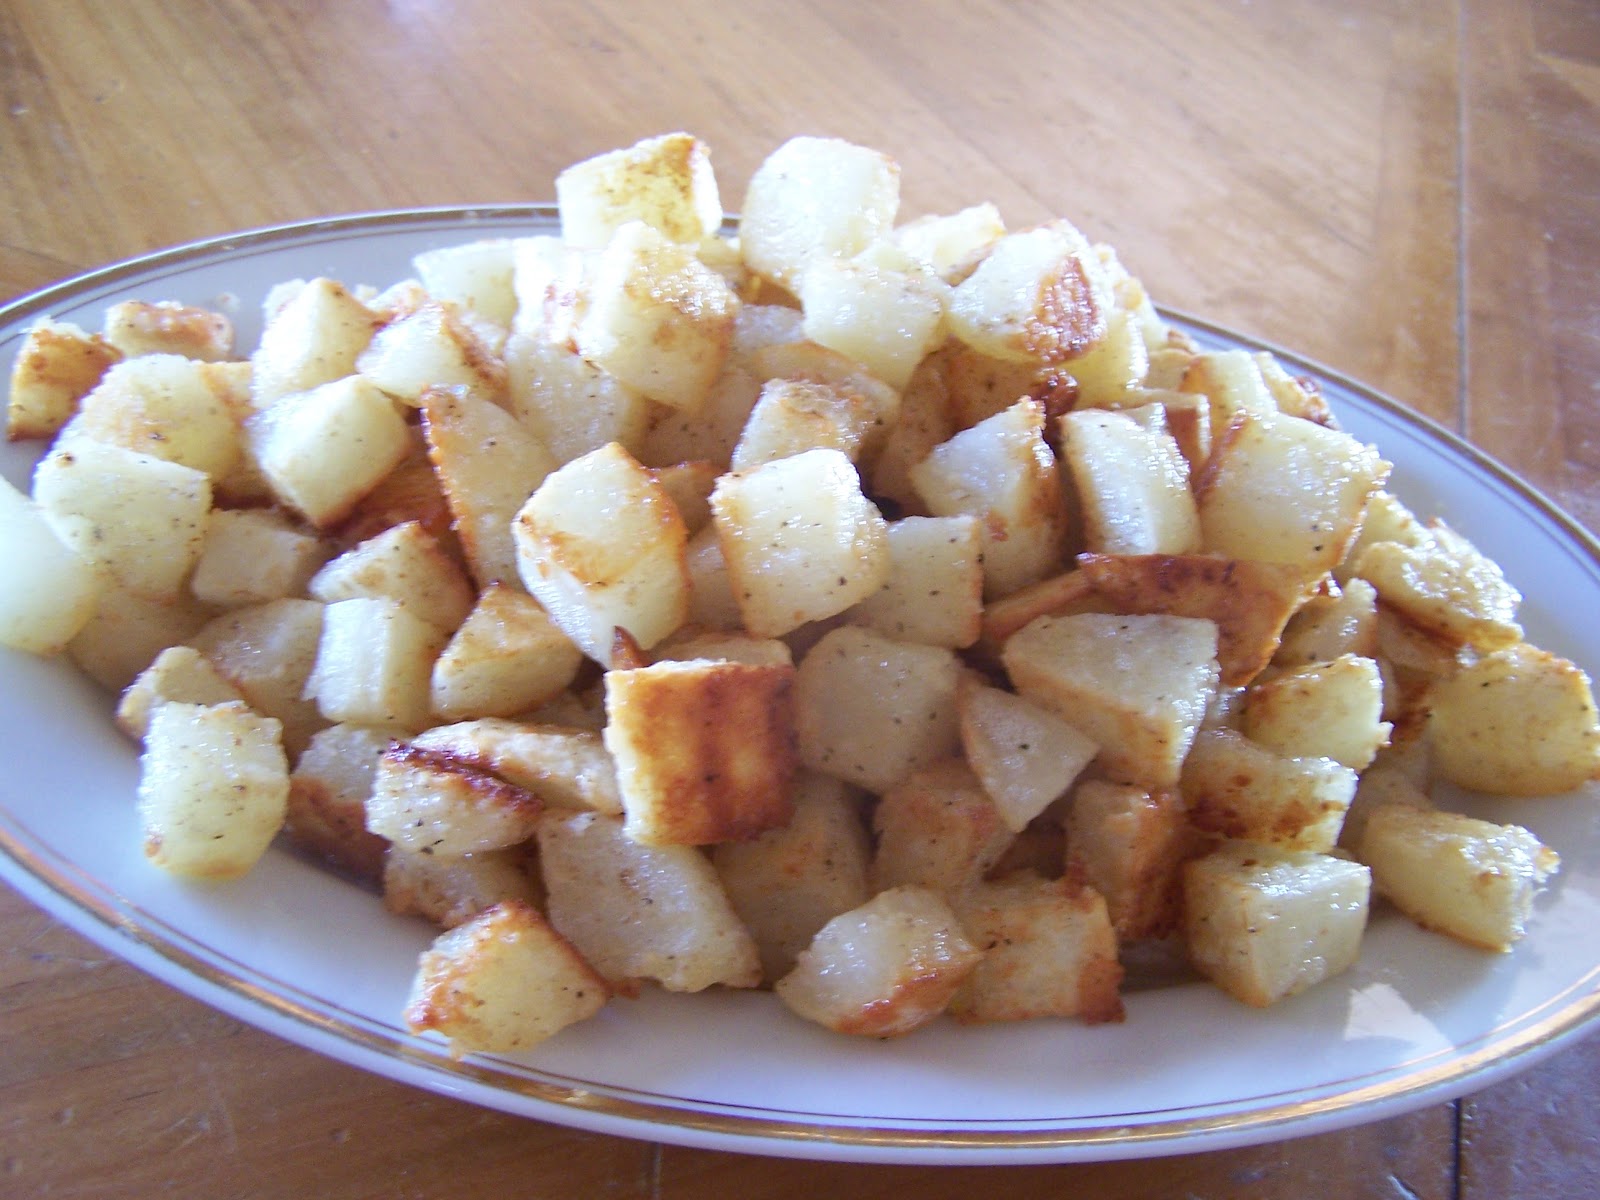
Parmesan Roasted Potatoes
I have a super easy and super delicious side dish for you today. And it involves one of my many favorite veggies--potatoes! One of the reasons that I love potatoes so much is because they are so versatile. I could probably cook potatoes every day for a year and not have the same flavors twice. Add in the fact that they're cheap and I'm sold!
These were a big hit with the family. They were crispy on the outside and soft and tender on the inside. I like to make these when we have company because they're easy and tasty!
Parmesan Roasted Potatoes
Serves 6-8
1/2 cup finely grated Parmesan
1/2 cup all-purpose flour
1 teaspoon kosher salt
1/4 teaspoon black pepper
8 large boiling potatoes (3 1/2 pounds), peeled and cubed
1 stick (1/2 cup) unsalted butter
In a large zip top bag combine flour, salt, pepper and Parmesan cheese.
Rinse potatoes and drain in a colander. Add potatoes to flour mixture, tightly sealing bag, and shake to coat well.
Heat the oven to 350°. Place the butter on a large baking sheet and put in the heated oven to melt. Remove the pan from the oven and arrange the potatoes in 1 layer in butter. Roast the potatoes, turning twice, until browned and crisp, about 30 minutes.
Source: A Mommy's original recipe
Thursday, June 9, 2011
Chicken Club Sandwiches with Lemon Dill Mayo
I really love sandwiches! On busy nights we can be found eating Pesto Club Sandwiches, Hot Ham Hogies, BBQ Chicken sandwiches or these Gooey Ham Sandwiches with some french fries or fresh veggies. Sandwiches just come together so quickly and the variations are endless, so there's no reason to ever get bored with them. This version of a chicken club sandwich is simple and delicious. I came up with this when I had a get together with some friends from college and it was a big hit. The chicken is so tender and juicy and the Lemon Dill Mayo was perfect.
Just a note about the chicken. You want it to be really thin. A thick piece of chicken could spell disaster if it isn't easy to eat. Cutting it lengthwise into 2 cutlets and then pounding them flat makes it so tender and easy to bite into. The whole thing just melts in your mouth. It can also be made earlier in the day to make mealtime completely no fuss!
Chicken Club Sandwiches with Lemon Dill Mayo
Serves 4
2 boneless skinless chicken breasts, cut in half lengthwise and pounded thin
1 cup crushed butter flavored crackers (I used Ritz roasted vegetable flavor)
1 Tbs. butter
4-6 slices bacon, cooked
Fresh spinach
Fresh sliced tomatoes
8 sliced whole grain bread
Coat each piece of chicken in cracker crumbs. Melt the butter in a skillet over medium high heat. Cook the chicken until it is golden brown and cooked through. Lightly toast the bread and spread with Lemon Dill Mayo. Build the sandwich using the chicken, spinach, tomato, and bacon.
Lemon Dill Mayo
1/4 cup mayonnaise
Lemon zest, to taste
Juice of half a lemon
1/2 tsp. fresh chopped dill
Add all ingredients in a small bowl and mix well. Refrigerate 1 hour to allow flavors to combine.
Source: A Mommy's Original Recipe
Thursday, May 26, 2011
Falafels with Fresh Tzatziki
I really have to give my family credit. They have become pretty daring when it comes to food. I say that because these falafels are really different than most of the meals I make. But they are different in a good way. First of all, they're meatless, which is good. Second, the flavors and textures are unusual. Before they're cooked they look a little like, well, I won't say because its not polite, but once they're fried, they are fabulous. Crispy on the outside and soft in the middle. Combine them with fresh Tzatziki and you have a real winner. These are so easy, delicious and filling that you won't even notice that there isn't any meat.
These are usually served with pitas, but tomorrow I'll share the recipe for the delicious Soft Wrap Bread I made to go with them.
**This recipe uses a food processor.**
Falafels with Fresh Tzatziki
Serves about 6
1 can chickpeas (drained)
1/2 yellow onion, roughly chopped (about 1 cup)
2 Tbs. fresh parsley
2 Tbs. fresh cilantro
1 tsp. salt
3/4 tsp. red pepper flakes
4 cloves of garlic
1 tsp. cumin
1 tsp. baking powder
1/2 c.+ flour
vegetable oil for frying
1 recipe of Soft Wrap Bread (or store bought pitas-- If you're in a pinch)
English cucumber slices, quartered
tomato, diced
shredded romaine lettuce
1/2 red onion, sliced paper thin
Tzatziki sauce
Place chickpeas and onions in a food processor. Pulse until almost smooth. Add the parsley, cilantro, salt, red pepper, garlic, and cumin. Process until well-blended but not pureed.
Remove chickpea mixture and place in a bowl. Sprinkle in the baking powder and flour, and gently mix. Add enough flour so that the dough can form a small ball without being too sticky. Refrigerate, covered, while you heat the oil and chop the veggies. Mixture can easily be made several hours ahead of time.
Using a small cookie dough scoop sprayed with Pam, form the chickpea mixture into balls about the size of walnuts (you should have about 16-18 balls). Flatten between greased hands, until each ball becomes a 3 inch circle.
Heat 2 inches of oil to 350 degrees in a deep pan (I always use a candy thermometer to make sure my oil temperature stays consist ant) and fry 1 ball to test. If it falls apart, add a little flour. Then fry about 5 balls at a time for a few minutes on each side, or until golden brown. Drain on paper towels and sprinkle with salt.
Stuff warm pita bread with 2-3 falafel balls and all vegetable toppings. Add a generous amount of tzatziki and serve hot.
Tzatziki Sauce
16 oz. plain yogurt (not fat free unless it is Oikos or Fage or another Greek-type yogurt)
1/2 hothouse cucumber or 1 regular cucumber, peeled and seeded (I used 1/2 of an English cucumber)
2-3 cloves garlic, pressed through a garlic press (or finely minced)
1 teaspoon red wine vinegar
Salt and pepper
Squeeze of fresh lemon juice
Extra virgin olive oil
Strain the yogurt using cheesecloth or a fine mesh strainer over a bowl. Let strain for several hours or overnight, if possible, to remove as much moisture as possible. (You won’t believe how much liquid drains from the yogurt – it makes the yogurt much thicker and creamier. If you want to splurge on Greek yogurt, like Oikos or Fage, you won’t need to strain it like this.)
Shred the cucumber. Wrap in a towel a squeeze to remove as much water as possible. Mix together the strained yogurt, shredded cucumber, garlic, red wine vinegar, salt and pepper to taste, and lemon juice. Drizzle lightly with olive oil. Refrigerate for at least 30 minutes before serving to allow the flavors to meld.
Source: Falafels from On My Menu
Tzatziki from Mel's Kitchen Cafe
Thursday, March 17, 2011
Amazing Roasted Asparagus
Oh asparagus, how I love thee! I'm totally addicted to asparagus. I could eat it everyday and never get sick of it. I use it in soups, pasta dishes and crepes, but my favorite way to serve the ultimate spring veggie is oven roasted. The process is so simple and the ingredients so few that all you get is pure, unadulterated asparagus flavor.
Even the self proclaimed asparagus hater will love these. My kiddos rush to the the table whenever this is on the menu. I have a dear friend who after 39 years on the planet has only recently discovered this wonder of the culinary world. I offer her my congratulations and wish her and asparagus a long and happy relationship!
I'm getting a little dramatic here, but really, this stuff is great. Oven roasting (as opposed to boiling) brings out the sugars and flavors in this veggie. You really should try it...today.
Amazing Roasted Asparagus
Serves 4-6
1 lb. asparagus (thick spears are best for roasting)
2 Tbs. olive oil
Kosher/coarse salt
Fresh ground black pepper
Pre-heat oven to 400°. Wash the asparagus and break off the tough ends of the stem and discard. Lay the asparagus spears out in a single layer in a baking dish. Drizzle olive oil over the spears, roll the asparagus back and forth until they are all covered with a thin layer of olive oil. Sprinkle with salt and pepper. Rub over the asparagus so that they are evenly distributed.
Place pan in oven and cook for approximately 8-10 minutes, depending on how thick your asparagus spears are, until lightly browned and tender when pierced with a fork. Serve immediately.
Source: A long time family recipe
Thursday, March 3, 2011
Twice Baked Potatoes
I know what your thinking. Everyone knows how to make Twice Baked Potatoes. Well, you'd be surprised. Most people I know make boring potatoes with butter, milk, salt and pepper and cheese. And those are okay, but sometimes you just need to kick it up a notch. There are so many things you can fill these little baby's with, that there's no excuse for boring. Leftover cooked, chopped ham, crumbled bacon, green onions, cheese, and my favorite secret ingredient, Italian salad dressing. It adds just a bit of mystery to America's favorite side dish.
I know many people wrap potatoes in foil before they bake them to keep the skins soft and edible. But when I make these potatoes, I need the shells to be able to hold all the goodies on the inside, so I let the skins get a little tough and crispy.
Twice Baked Potatoes
Serves 6
6 baking potatoes, washed and poked with a fork
Warm milk
Butter
Salt and pepper to taste
Shredded cheddar and Monterrey Jack cheese
2-4 Tbs. Bottled Italian salad dressing
Any other add in you like (Chopped ham, crumbled bacon, cooked crumbled Italian sausage, green onions, minced garlic, chopped wilted spinach etc.)
Heat oven to 350°. Place potatoes in the oven and bake until soft and cooked through. Remove from the oven and allow to cool until they can be handled (or use a hot pad to hold them). Carefully cut off the skin on top of the potato lengthwise. Scoop out the flesh from each potato, leaving about 1/4 wall inside. Place the flesh in a bowl and mash with a potato masher. Add enough warm milk, butter, Italian salad dressing and salt and pepper to taste and to reach the desired consistency. Add the cheese and any other add in. Mix well. Spoon the mixture back into the empty potato shells. Place on a baking sheet and bake 10-15 minutes or until heated through. Serve immediately.
Source: A Mommy's original recipe
Thursday, February 24, 2011
BBQ Chicken Pasta Salad with Lime and Sour Cream
Its no secret, I really like pasta. Sometimes, much to Mr. Mommy's chagrin, I go a little overboard with it. Every week, I have to check my menu to make sure we aren't having pasta every day. There are so many ways to present it that its hard to get bored with.
Pasta salad is one of my favorite ways to serve it, but I get tired of the same old mayo or Italian dressing versions that seem to show up at every potluck dinner or BBQ. Enter THIS pasta salad. There's not a teaspoon of mayo to be seen, and the tangy bite comes from BBQ sauce. Its refreshingly different! The fact that its chock full of all different kinds of veggies takes away from some of the guilt associated with pasta salad. Now this isn't light by any stretch of the imagination, but it is light-er. (At least that's what I keep telling myself.) This will become a staple at all your family gatherings and BBQs, trust me!
BBQ Chicken Pasta Salad with Lime and Sour Cream
Serves 12-15
1 lb. bow tie or spiral pasta
2 cups frozen peas
1 cup frozen corn kernels
2 1/2 lbs. chicken, cooked and cut into bite sized pieces (Rotisserie chicken works great!)
1 1/2 cups BBQ sauce (I used Sweet Baby Ray's)
1 tsp. hot sauce
2 Tbs. Fresh lime juice (Did I mention is NEEDS to be fresh?)
1/2 cup sour cream
2 stalks celery, diced
1 medium red onion, diced
1 medium carrot, peeled and coarsely shredded
4 tomatillos, chopped
1/4 cup fresh cilantro
Salt and fresh ground pepper to taste
Bring a pot of salted water to a boil. Add the pasta and cook according to package directions. During the final 2 minutes of cooking, add the frozen peas and corn, stirring to make sure they don't stick together. Drain and rinse under cool water. Transfer the pasta mixture to a baking sheet to dry while you prepare the remaining ingredients.
In a bowl, whisk together the BBQ sauce, hot sauce and lime juice. Add the chicken and toss to coat.
In another large bowl, combine the sour cream, pasta and veggie mixture, celery, red onion, carrot and tomatillos. Toss well to coat. Fold in the chicken/BBQ mixture and cilantro, mixing until just combined. Season with salt and pepper.
Source: Taken from The Daily Herald newspaper many years ago
Friday, February 18, 2011
Italian Style Green Beans
Before I learned to cook, I thought Green Bean Casserole was a delicious side dish. And its okay, I just have an aversion to "cream of anything" soup. I cooked with it so often when I was first married that now I have a hard time eating it. I will really look hard for alternatives. There are just so many other ways to add flavor and creaminess.
This recipe is over the top good. It is cheesy and creamy and the smokiness the bacon adds is out of sight. Even my green bean hating kids ate this. One of the things I love about this recipe is you can use fresh, canned or frozen beans. Fresh would obviously be best, but I was really happy with the end result using home canned green beans.
This makes enough to feed a small army. I used 2 quarts of beans and still had too much cheese sauce, so don't add it all at once or you'll drown the flavor of the beans. Just stir the sauce in slowly until its just how you like it, and I guarantee you'll love it!
Italian-style Green Bean Casserole
Serves 6-8
1 1/2 -2 pounds fresh green beans, ends trimmed (I used 2 quarts of home canned beans)
8 tablespoons butter, divided
2 tablespoons onion, minced
5 cloves garlic, minced
1/4 cup flour2 cups milk
1 roasted red pepper, diced (roast your own, or use jarred peppers-check the pickle and olive section at the grocery store)
sea or kosher salt and fresh black pepper
1/2 pound mozzarella cheese, cut in small pieces
6-8 slices bacon, cooked crisp and crumbled
3/4 sleeve Ritz crackers
1/4 cup Parmesan, grated
Preheat the oven to 400 degrees F. Butter a 2 quart casserole dish or a 9x13 casserole pan. Gently steam the green beans just until tender but still firm. Arrange in pan.
Melt 4 tablespoons of the butter in a medium sauce pan over medium low heat. Add the onions and saute until translucent. Add garlic and saute until fragrant. Whisk in flour and cook for 2-3 minutes, whisk in milk, bring to a simmer, stir in red peppers and cheese. Turn off heat and stir until cheese is melted. Season with 1/2 teaspoon salt and 1/8 teaspoon black pepper. Stir in the bacon. Taste and re-season if desired.
Pour the sauce over top of the green beans. Crush the crackers into crumbs and melt the remaining 4 tablespoons butter, combine along with Parmesan and sprinkle over top of casserole. Bake 20-25 minutes until bubbly and golden on top.
Source: Adapted from Cinnamon Spice and Everything Nice
Tuesday, February 15, 2011
Chicken Cordon Bleu Crumble
Do I have a yummy dish to share this morning! This is a combination of 3 different recipes, so I'm calling it an original. I love cordon bleu, but I don't make it very often because it can be time consuming and to be honest, my kids just don't appreciate it. This comforting dish lets you enjoy the flavor without the fuss. The crumble topping can be used in a variety of different dishes, including Chicken Pot Pie. It is easy to make and tastes great!
Serves 6
For the Chicken and Sauce:
4 tablespoons butter
1 pound boneless, skinless chicken breasts cubed (about 2-3 chicken breasts)
1/2 cup minced yellow onion
2 cloves garlic, finely minced
2 tablespoons flour
½ cup apple juice (I used chicken broth)
1 cup chicken broth
1/2 cup heavy cream
1/4 cup freshly grated Parmesan cheese
2 tablespoons prepared Dijon mustard
1 teaspoon dried thyme
3 cups broccoli florets
Salt and cayenne pepper to taste
Shredded Swiss cheese (I used a combination of mozzarella and provolone)
Crumble Topping:
2 c. flour
2 tsp baking powder
3/4 tsp salt
1/2 tsp pepper
1/8 tsp cayenne pepper
6 Tbsp unsalted butter, chilled and grated on a coarse cheese grater
3/4 c. Parmesan cheese
1 c. heavy cream
Place the broccoli florets in a microwave-safe bowl and cover with plastic wrap or a tight fitting microwave-safe lid. Microwave on high for 3-4 minutes until tender but still bright green. Remove the plastic wrap and set aside.
In a 10- or 12-inch skillet, melt the butter over medium heat. Add the chicken and saute until the chicken just begins to brown. Stir in the onions and garlic and cook, stirring often, until softened, about 2 minutes. Sprinkle the flour over the chicken/onion mixture and stir to incorporate. Cook, stirring, constantly for one minute.
Gradually add the chicken broth and apple juice, stirring constantly to avoid any clumps from forming. Stir in the cream, Parmesan cheese, mustard and thyme. Simmer for about 5-6 minutes, until the mixture is thickened and bubbly. Stir in the broccoli and shredded cheese; season with salt and cayenne pepper to taste. Allow the cheese to melt, stirring occasionally. Pour into a 9 x 13 baking pan that has been sprayed with non-stick cooking spray.
FOR THE TOPPING:
Combine flour, baking powder, salt, pepper, and cayenne in large bowl. Sprinkle butter pieces over top of flour. Using fingers, rub butter into flour mixture until it resembles coarse cornmeal. Stir in Parmesan. Add cream and stir until just combined. Crumble mixture into irregularly shaped pieces onto a baking sheet. Bake at 450-degrees until fragrant and starting to brown (10-13 minutes).
Scatter the crumble topping evenly over the chicken/broccoli filling. Bake at 400-degrees until filling is bubbling and topping is well browned (about 12-15 minutes).
Source: A Mommy's original recipe
Monday, December 27, 2010
Garlic Mashed Potatoes
I really wish I had a better picture of this or that they LOOKED like Garlic Mashed Potatoes. Because I have to say, these are amazing! Who knew a potato with no gravy could have so much flavor or could call to me the way these do. And there isn't even any bacon in them! I can't tell you how many times I've made these in the past few months. I think they are partly responsible for me fitting into jeans that were too big a few months ago. All the chocolate I've eaten could have helped too, now that I think about it. But if I had to choose between chocolate and these potatoes, right now the potatoes would win. These are perfect paired with just about any meal. Chicken, meatballs, meatloaf, roast, ham...the list is endless.
Garlic Mashed Potatoes
Serves about 6
6 russet potatoes, peeled and cut into chunks
2/3 cup half and half or milk
6 Tbs. butter
3 cloves garlic, peeled and smashed
2-3 tsp. kosher salt, or to taste (1-1/2 tsp. table salt)
black pepper to taste
Put the potatoes in a large pot and cover with water. Boil over high heat until the potatoes are tender, about 10-15 minutes. Drain well and transfer to a mixing bowl. In a small saucepan combine the half and half, butter and garlic cloves. Heat over medium heat until the butter is melted and the cream is warm, stirring occasionally. Remove from heat and set aside.
Mash the potatoes with a potato masher until smooth. Remove and discard the garlic. Pour the cream mixture over the potatoes and add the salt and pepper to taste. Using a rubber spatula, fold the potatoes over themselves to combine the ingredients, but try not to over mix.
***I sometimes use more or less half and half depending on what I'm serving them with and how creamy or stiff I want them.***
Source: A recipe I've been making more years than I can count.
Wednesday, December 22, 2010
Chunky Chicken Noodle Soup
This is one of my favorite soups. It is so warm and comforting and full of homemade goodness. I love to make it on cold winter evenings. Especially after playing out in the snow with my kids. It's also what everyone requests when they're sick. It warms you all over and feels like a hug in a bowl. I love how easy it is to put together. I can chop the veggies while the chicken cooks, so its ready in no time.
Chunky Chicken Noodle Soup
Serves 8-10
3 Tbs. olive oil
1 medium white onion, chopped
5 stalks celery, chopped,
4 large carrots, peeled and sliced
1 cup sweet red peppers, chopped
1 zucchini chopped into 1/2" pieces
1 yellow squash, chopped into 1/2" pieces
5 cloves fresh garlic, minced
48 oz. chicken broth
9 oz. thin noodles
1 Tbs. coarse Dijon mustard
1 tsp. hot sauce
2 large chicken breasts, cooked and shredded
1 cup fresh parsley, finely chopped
pinches of kosher salt, black pepper, garlic salt, and thyme
Place the oil in a large pot over medium high heat. Aadd the onion, celery, carrots, sweet peppers, zucchini, yellow squash. Cook and stir until tender, about 5-7 minutes. Stir in the fresh garlic; mix in for 30 seconds then stir in the broth. Bring the soup just to a boil and stir in the noodles. Cook 7-10 minutes or until noodles are al dente. Stir in Dijon mustard, hot sauce, chicken, parsley and seasonings to taste. Reduce heat and simmer until ready to serve.
Source: A recipe I've been making for many years.
Monday, December 20, 2010
Broccoli Cheese Salad
I wish I could have come up with a better name for this salad. Something that told you how yummy and different this really is. Its a nice switch from the pasta salads that seem to over take any picnic or potluck. I've had this several times over the past few years, but never had the recipe until now. It was a family favorite from the first bite. My oldest (vegetable hating) daughter took one bite and said "Oooh Mom, I love this!". If that's not a glowing recommendation then I don't know what is.
This salad can be made ahead of time too! It even tastes better the second day. If you're going to prepare this in advance wait until just before you serve it to add the cheese. That way it won't get soggy sitting in the dressing. I'm taking this to our family Christmas potluck dinner.
Broccoli Cheese Salad
Serves 12
1 cup crasins
1 1/2 lbs. broccoli, chopped into small pieces
8 slices bacon, cooked and crumbled
1/2 cup sweet red onion, chopped
1/2 cup shredded cheddar cheese
1 cup sunflower seeds
3/4 cup mayonnaise or salad dressing
1 Tbs. vinegar
1/4 cup sugar
Combine the mayonnaise, vinegar and sugar. Mix well. Combine the crasins, broccoli, bacon, onion, cheese and sunflower seeds. Toss well. Add the mayonnaise dressing and mix until well combined.
Source: My friend Jenna T.
Monday, November 8, 2010
Seasoned Potato Wedges
My family absolutely loved these potato wedges! They don't take much more time to make than frozen french fries, but they taste so much better. They can also be customized to what your family likes. I used paprika and seasoned salt, but you could season them with dry ranch dressing, taco seasoning, BBQ seasoning or Cajun seasoning. You are only limited by your imagination! We dipped ours in fry sauce. Most of the country has never had fry sauce since its kind of a Utah thing, but trust me, its yummy! I'll search for a knock off recipe and I'll post it soon. But I'll warn you, you'll get addicted.
These are baked on a wire rack that is placed over a large baking sheet just like the BBQ Chicken Strips. It allows the air to circulate all the way around the food and helps make it crunchier rather than soft and sometimes soggy. Its a super simple technique that really improves the texture of oven fried foods.
Seasoned Potato Wedges
Serves 6-8
2/3 cups flour
2/3 cup grated Parmesan cheese
2 tsp. paprika
2 tsp. seasoned salt
2 1/2 lbs. baking potatoes, peeled
1/2 cup milk
non-stick cooking spray
In a large resealable plastic bag, combine the flour, Parmesan cheese, paprika and seasoned salt. Cut each potato into 8 wedges. Dip each wedge in milk then in the flour mixture. Place on a greased wire rack that has been set on a large baking sheet. Spray each wedge with cooking spray. Bake at 400° for 20 minutes. Turn each wedge over, spray with cooking spray and bake 20 minutes longer or until the potatoes are tender and golden brown. Serve immediately.
Source: A Mommy's original recipe
Subscribe to:
Posts (Atom)